Below are instructions for configuring RStor to provide access to others within CNS or at CSU.
Please substitute your RStor folder/Group name everywhere you see “RStorGroup.”
At first, only the original owners and members you have access to this folder. These were set in place when your RStor account and Group Share was created. Should you want to share this folder with others, group permissions management can be accomplished using a combination of RStor folder permissions (security tab), and groups defined using a university tool called Grouper. Grouper is available by logging into https://grouper.colostate.edu using your CSU NetID and CSU NetID password.
Groups created in Grouper are automatically provisioned in Active Directory (the authority that RStor uses for file and folders security permissions) using the following naming convention:
gpr_csurs_natsci_[grouper folder name]_[grouper group name]
For your RStor Group Share, CNSIT has created two Grouper groups on default. One is an admins group and the other is a members group.
Members of the admins group (named gpr_csurs_natsci_RStorGroup_admins in Active Directory) have full control of your RStor folder and can manage Grouper groups as well as set permissions in your RStor Group folders through the Windows security tab. You may add members to this initial admins group and/or create additional groups within Grouper to help manage Grouper permissions and/or define RStor folder security.
Members of the initial members group will have access (edit) to the RStor Group folders, but cannot alter permissions through the security tab nor manage Grouper groups for this RStor folder.
ADVANCED:Managing permissions for your RStor folder using Grouper – with theoretical examples that stray from the default setup.
The following steps detail how to create an additional group and assign/restrict permissions to your RStor folders.
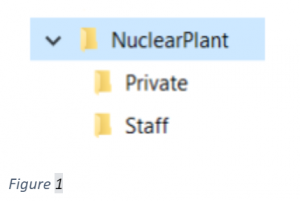
Let’s say you have created two folders in your RStorGroup folder as follows:
Initially, all members of your your admins and members groups have access to these folders. You would like to limit access to allow only a certain group of members to access the “Staff” folder. Additionally, you only want admins to access the “Private” folder.
In the Browse folders section (lower left), expand Root/app/CSU R-STOR/NATSCI/RStorGroup
Verify that the RStorGroup folder is selected. The breadcrumbs at the top (middle) should show: Home > Root > app > CSU R-STOR > NATSCI > RStorGroup
Click the green + Create new group button (upper left).
The New group screen should appear.
Leave the “Create in this folder” path as it is… it should say app:CSUR-STOR:NATSCI:RStorGroup
In the Group name field, type the name of the group you want to create. In this example: staff
Leave the Group ID field as it is, do NOT edit.
Give a description about this group, like: “This staff group will contain users that will have access to the “Staff” folder.”
Click the Save button.
Click on the new staff group listed in the table.
Verify you’re viewing the staff group. The breadcrumbs at the top should show: Home > Root > app > CSU R-STOR > NATSCI>RStorGroup > staff
Click the orange + Add members button (upper right)
In the Member name or ID field, type the NetID of the user (e.g., hsimpson)
Pick the correct user account from the suggestions shown.
Leave the privileges radio button set to “Default privileges”
Click the Add button.
This staff group (known as gpr_csurs_natsci_RStorGroup_staff in Active Directory) has now been created and you have added Homer Simpson as a member of this group. Repeat step 6 to add additional members to the Staff group.
**Please note, creating groups in Grouper may take 60 minutes to replicate to Active Directory**
Let’s adjust the RStor folder permissions for this new group. First we need to give the members of the staff group access to your RStorGroup folder so they can get a directory listing.
Within Windows Explorer, navigate to your mapped RStor folder.
Right-click the RStorGroup folder, choose Properties and go to the Security tab.
Click the Edit button to open the Permissions dialog.
Click the Add button and type COLOSTATE\gpr_csurs_natsci_RStorGroup_staff in the object names field.
Click OK to return to the Permissions dialog.
Choose the following three permissions for the staff group you just added (These permissions will give the Staff group the ability to navigate into your RStorGroup folder and act just like a member of the normal “members” group can) :
Modify
Read & Execute
List folder contents
Read
Click OK to close the Permissions dialog.
Click OK to close the RStorGroup properties dialog. Now give the staff group the ability to add/remove files/folders in the Staff folder, while removing the members group from their access.
Right-click the Staff folder and choose Properties
Click on the Security tab and select the gpr_csurs_natsci_RStorGroup_staff group in the list.
Verify the “modify” permissions are still set.
Now, click the Advanced button to open the Advanced Security Settings dialog.
Click the Disable inheritance button and choose to Convert inherited permissions into explicit permissions on this object.
Now, click on the ‘edit’ button and then choose the gpr_csurs_natsci_RStorGroup_members group from the list. You will now click on the Remove button.
Now we want to restrict access to the Private folder to just the admins. Right-click the Private folder and choose Properties
Click on the Security tab and then click the Advanced button to open the Advanced Security Settings dialog.
Click the Disable inheritance button and choose to Convert inherited permissions into explicit permissions on this object.
Select gpr_csurs_natsci_RStorGroup_staff group in the entries list and click the Remove button.
Select gpr_csurs_natsci_RStorGroup_members group in the entries list and click the Remove button.
This will prevent the staff and members group from accessing files/folders within this Private folder.
Click OK to close the Advanced Security Settings dialog.