Using Windows Snipping Tool to capture all or part of your screen
By Aaron Vanasse
Published on October 11, 2017 10:33 am MT Posted in General CNSIT
Most of us have had to capture our PC screens at some point for work, school or both. It can be a simple or incredibly frustrating experience. With the advent of Snipping Tool, this process has become much simpler and certainly more user friendly, as you’ll see in this walk-through tutorial.
One of the great features in Windows Snipping Tool is the ability to capture the whole screen or just a portion by highlighting an area on your screen and “capturing it” or “snipping it” to insert the captured content into an email, document, power point presentation etc.
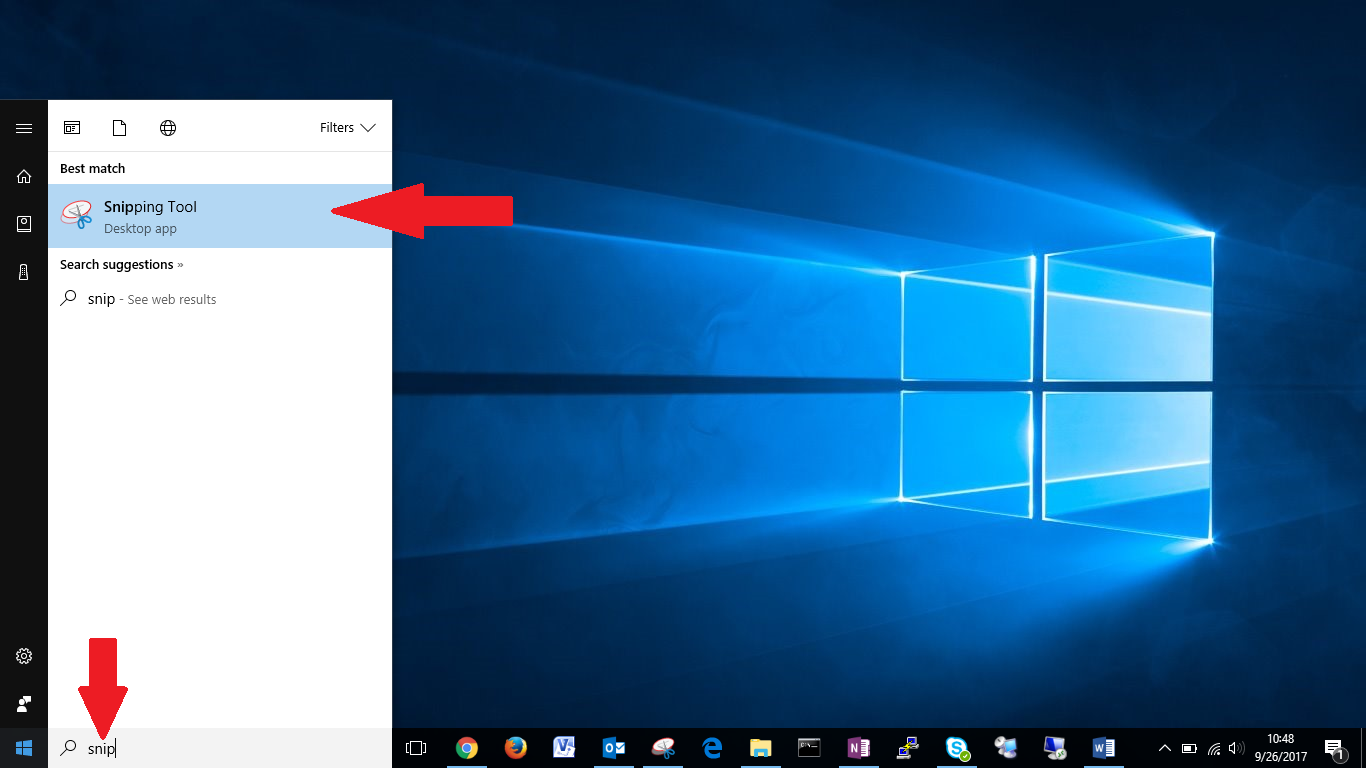
The first thing we must do is find the application called Snipping Tool. The quickest way of finding Snipping Tool is to click on the Windows icon in the lower left corner of screen. Once you click, you can begin typing: “snip” into the menu. You will see the Snipping Tool application appear at the top of the search box. You can now click on it.

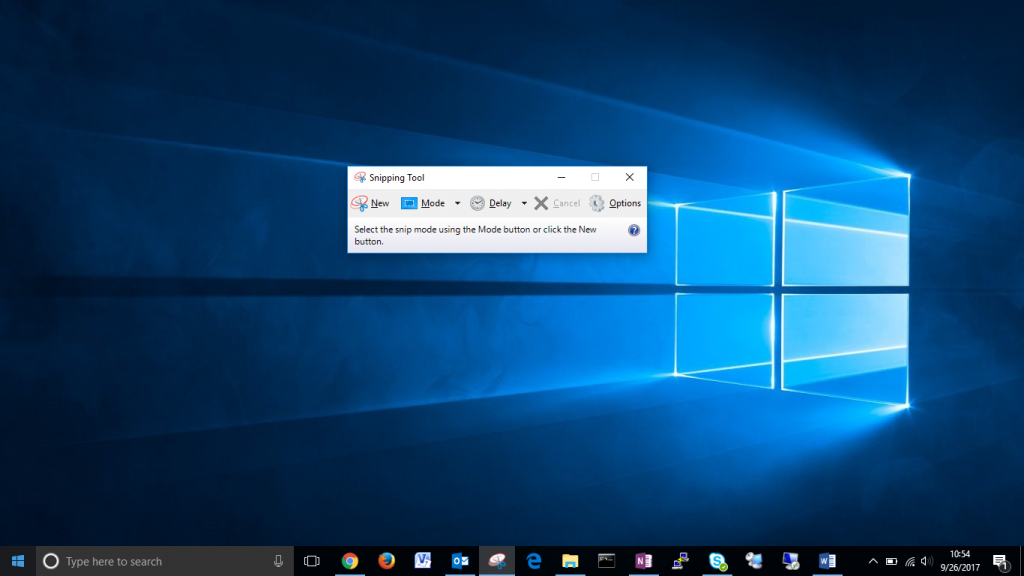
Once you click on the Snipping Tool you will see a small box (see below) appear, this is the interface for capturing all or part of your screen.

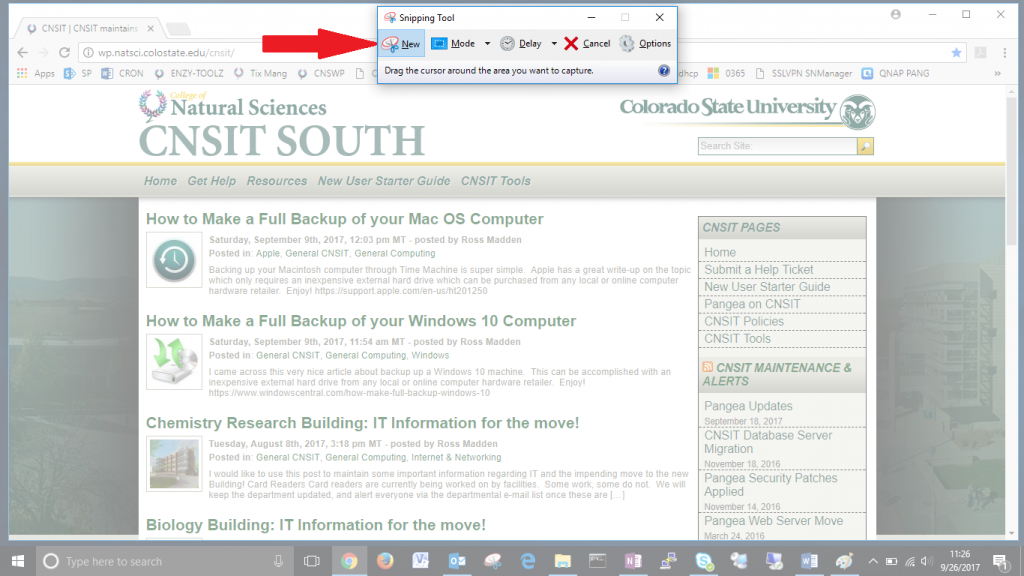
Now let’s say we want to capture just a small section of a website and put it in an email to show a colleague. Now we can click on the “New” tab on the ribbon of the Snipping Tool box as indicated by the red arrow below. When you first click on “New”, the entire screen will become semi-translucent, which indicates that your screen is ready for you to select what you want to capture.

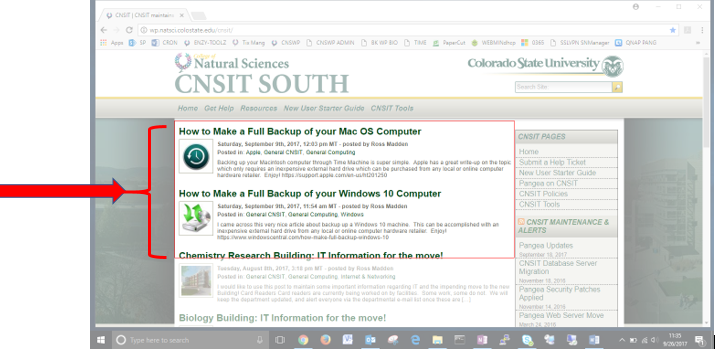
As long as you hold the mouse button down, you can resize the area you want to capture. As you’ll see below we highlighted Chemistry Research Building and How to Make Backups for Windows 10 and Mac OS, however, if you look at the next capture below this one you will see we resized the capture area just a bit and just captured Windows and Mac OS backup sections leaving Chemistry Research Building section out of it.

Below is the result of the selective capture we just performed.

This is basic functionality of the Snipping Tool. With practice, you will be cutting and pasting screen shots like a pro!
