By Ross Madden
Published on January 8, 2026 10:38 am MT Updated on January 8, 2026 10:38 am MT Posted in Knowledge Base, The Cloud
Azure AD Groups are used to manage access to various resources in the Modern Desktop environment. If you happen to find yourself the owner of one of these groups, here are some directions on how you can manage the member list.
First, know the name of your group, for example:
CNS-Bio Naug-Lab-RDP
This group might be used to control the users that are allowed to remote desktop connect to various Naug lab computers.
First, open a web browser and head over to the Azure web portal at https://portal.azure.com/ You will log in to this resource using your CSU M365 credentials which have a username following the format “NetID@colostate.edu” and use your CSU password.
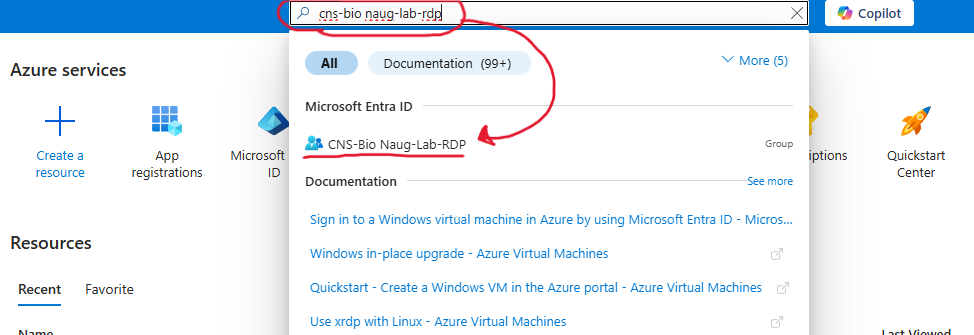
Once connected you can use the top search bar to enter in the name of the group you are looking to manage as shown in this screenshot. You should see if appear and you just need to click that link to go to its properties page.
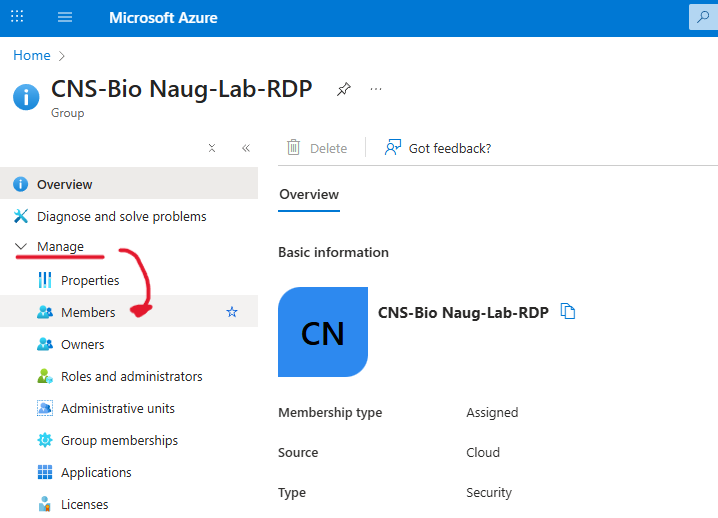
On the properties page you will click to expand the “Manage” item on the left side and select the “Members” choice.
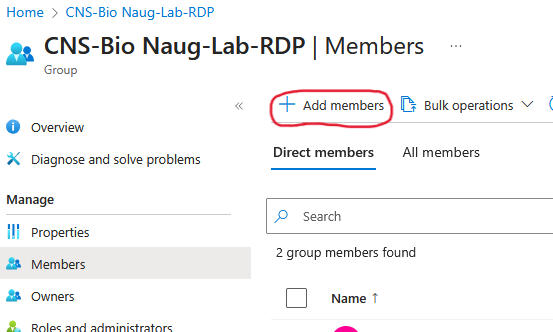
You will now click the “Add members” button at the top where you can enter in names to filter down the list and “select” the users you would like to add. If the “Add members” link is grayed out, you can see who the actual owners are by clicking on the “Owners” item on the left side of the page. This is the user that has access to add members and you will need to contact them directly for group member management.