If you’re off campus and notice that your computer is not receiving updates for Windows or if software that should be available to you is not listed in Software Center these instructions will refresh Software Center allowing you to install the updates or software.
In the windows search bar type “disk cleanup” and launch the disk cleanup application.
The c: drive should be the default drive listed, but if it’s not select the c: drive using the drop down.
Disk cleanup will scan your drive which can take a minute or two.
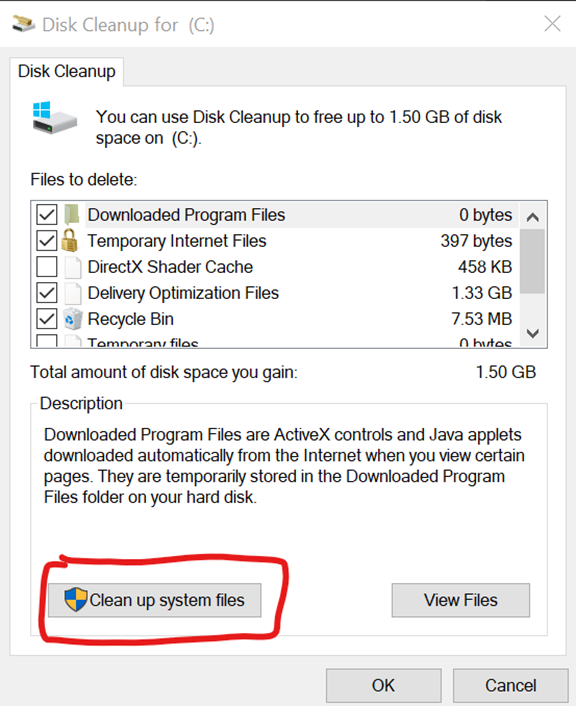
Once it’s done scanning you will click on the “Clean up system files” button (see below).
If you need administrator credentials to complete this step open a ticket with us (https://cnsit.colostate.edu/) and we can provide administrator credentials.
You will select the c: drive again from the drop down, and the application will scan your drive for system files. This can take longer than the original scan.
Once the scan is done you will want to select the following files to delete: Windows Update Cleanup, Windows upgrade log files, BranchCache, Delivery Optimization Files, Device driver packages, Temporary Windows installation files, and Thumbnails.
Once all of those files have been selected you will click on “OK” and disk cleanup will begin to delete those files from your computer. This process can take up to 10-15 minutes depending on the amount of files being deleted.
After disk cleanup is done running restart your computer.
Once you’re logged back in and connected to the VPN type “control panel” in the Windows search bar.
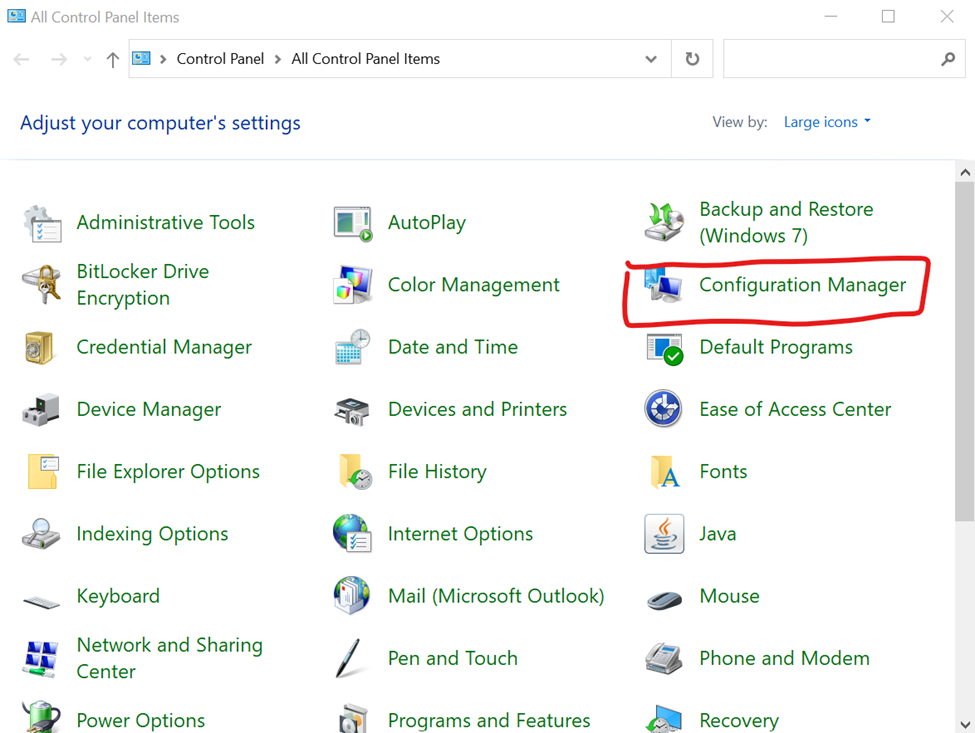
Depending on your control panel view settings you will either see “Configuration Manager” in the list of control panel items and you will click on it (see below).
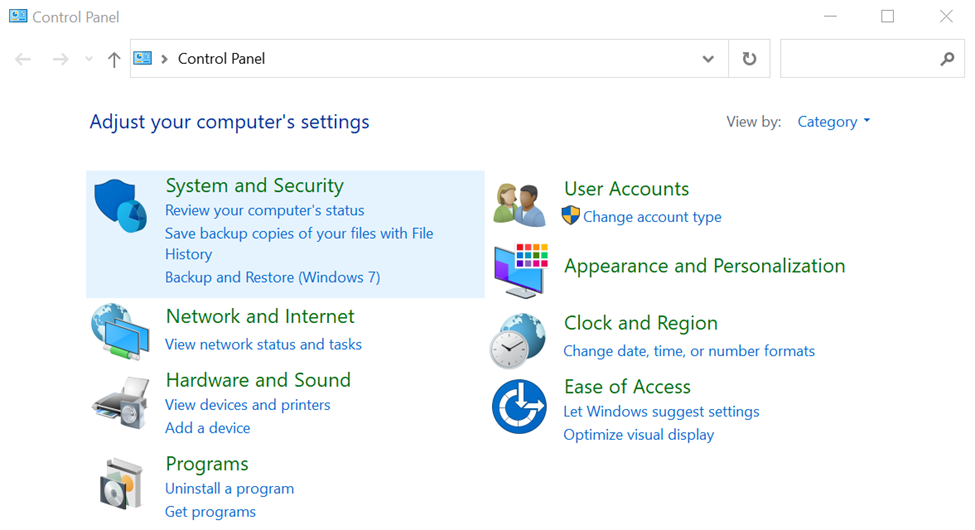
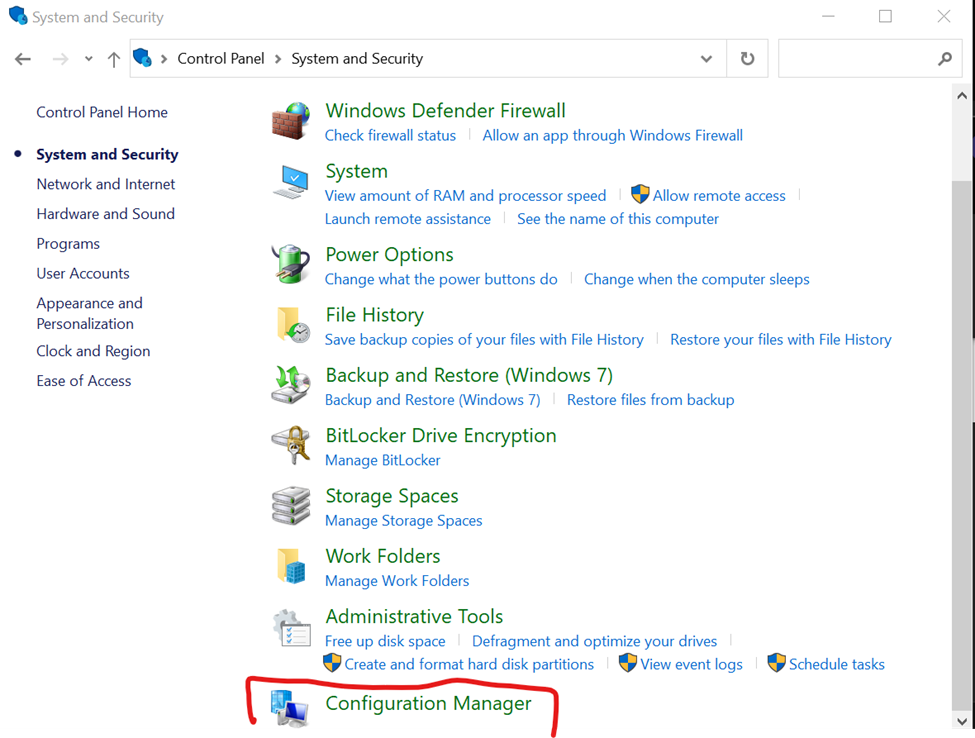
Or, you will see overarching settings in which “Configuration Manager” is within the “System and Security” settings (see below).
Click on “System and Security” and scroll down until you see “Configuration Manager” and click on it (see below)
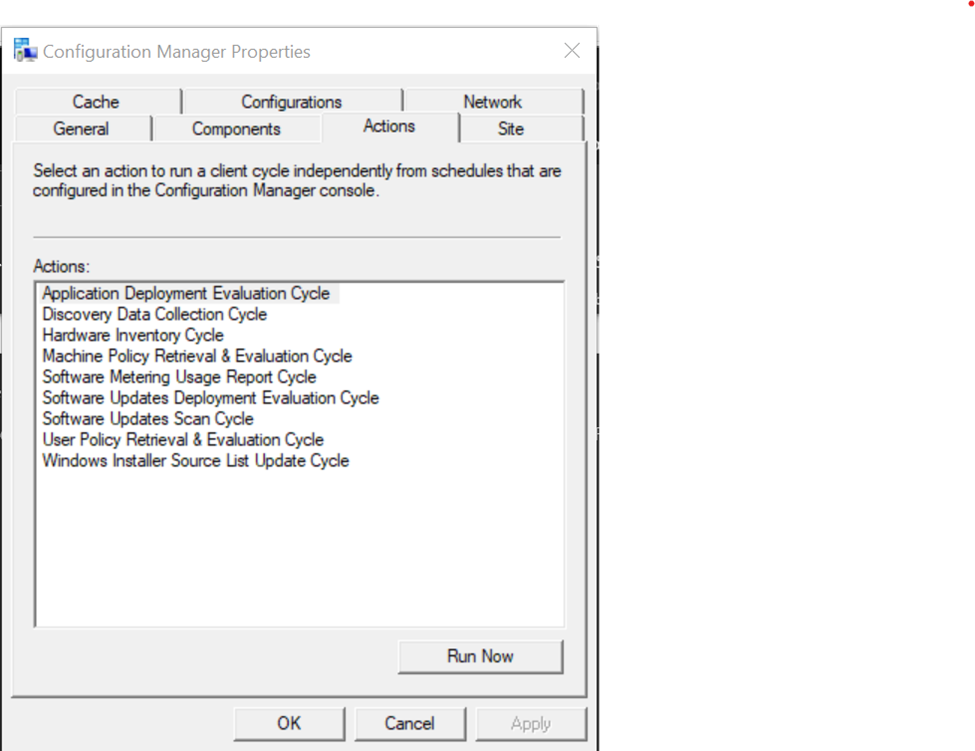
This will open the Configuration Manager menu and you will click on the “Actions” tab.
Once you have the “Actions” tab selected you will click on each action and then click on “Run Now” (see below).
You will have to select each action and click on “Run Now” for it to fully check in with our management server.
After each action has been run the computer will check in with our server and start installing updates and software within 30 minutes.