Network Attached Storage (NAS) is an inexpensive way to provide shared mass (local-ish) storage to your group. However, without these devices backed up, they are little better than the hard drive disk arrays you might have in a desktop computer. Fortunately, many NAS manufacturers now have the ability to synchronize and backup your NAS data to cloud storage services, such as an M365 SharePoint site. This article will walk through the setup of the QNAP brand NAS’s QTS backup to an M365 SharePoint using the “HBS 3 Hybrid Backup Sync” app.
Identify/Request a SharePoint Site
Many groups already have a SharePoint site. If your group does not have a SharePoint site you can request one by contacting CNSIT with a ticket at https://cnsit.colostate.edu/help
Once you have identified your SharePoint site, it is best to create a new folder in the root of that which can contain the NAS backup data. I usually name the folder “Backups” and then create a folder with the name of the NAS inside that. This will be the destination folder that we will choose when setting up the sync.
Install the HBS 3 Hybrid Backup Sync App on your NAS
Now that you have your SharePoint site set up properly, you will need to install the “HBS 3 Hybrid Backup Sync” app onto your QNAP NAS. You will know if this is already installed if you see the icon on your QNAP QTS dashboard.
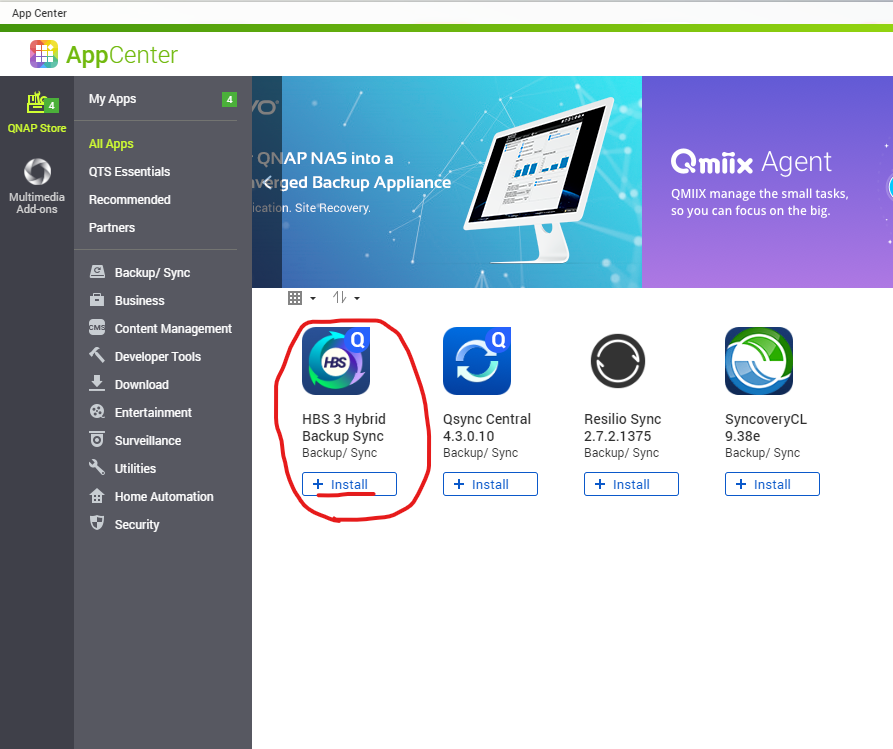
To install the app, open the “App Center” from the dashboard and search for “sync” in the top right search bar. One of the options will be the “HBS 3 Hybrid Backup Sync” app, which you will click “Install”.
After a few minutes this will be installed and ready for configuration. You can close the “App Center” and you will now see the “HBS 3 Hybrid Backup Sync” tile on your dashboard.
Set up the Backup
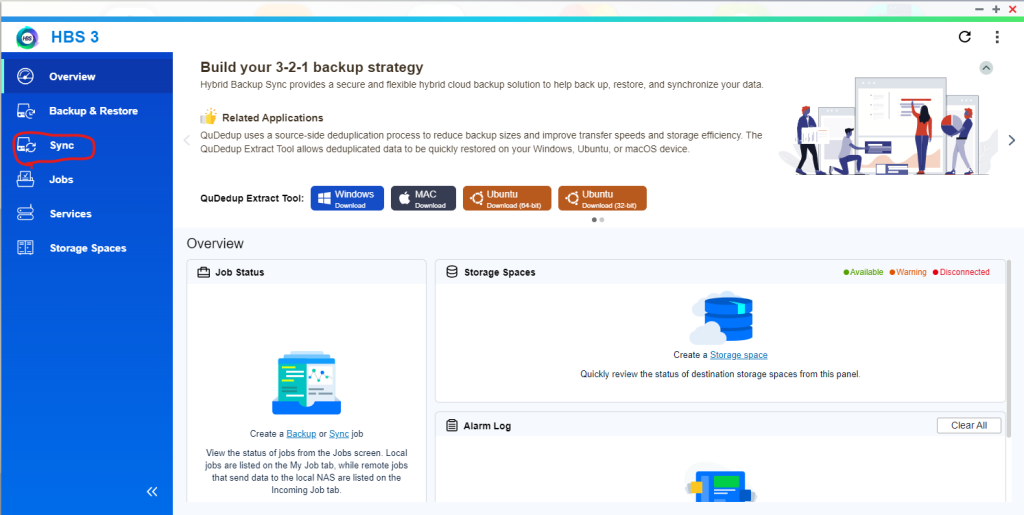
When you open the “HBS 3 Hybrid Backup Sync” app for the first time, you can skip through the welcome dialog boxes. Once those are cleared, you will select the “Sync” option on the left side:
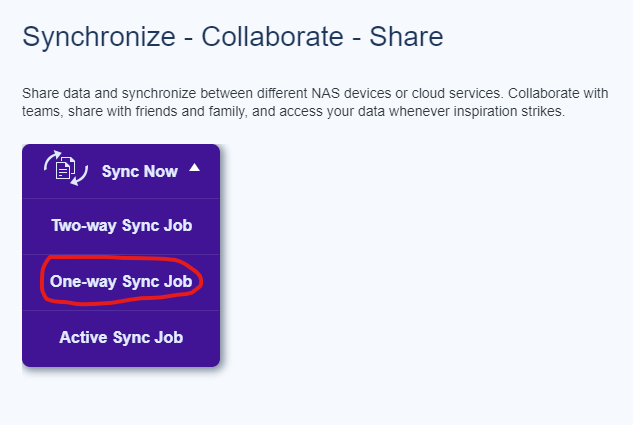
You will then choose the “One-way Sync Job” from the drop down menu.
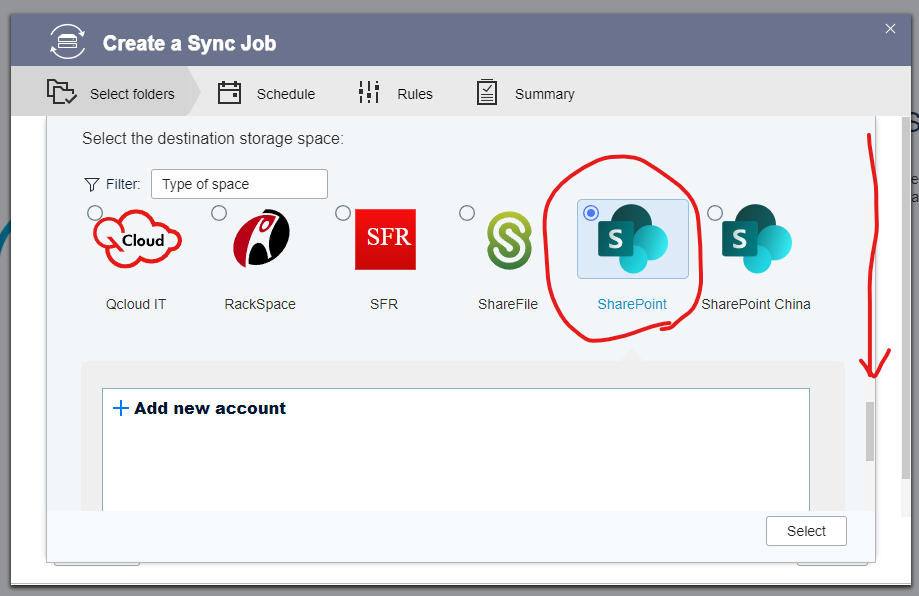
You will now see the following windows. Scroll down through the list of services until you find the “SharePoint” option. Selecting that will prompt you to log in to the M365 portal using your credentials.
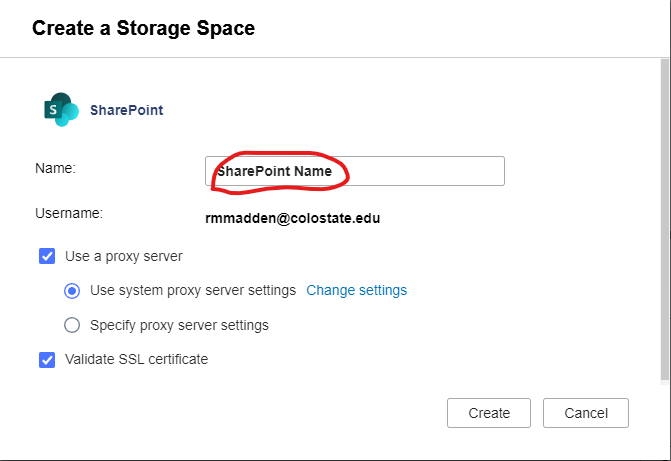
After you have authenticated, you can give your SharePoint account a name. This is arbitrary, but it is wise to choose something that describes the connection such as “Lab SharePoint”. You can keep the other settings as they are on default and click the “Create” button.
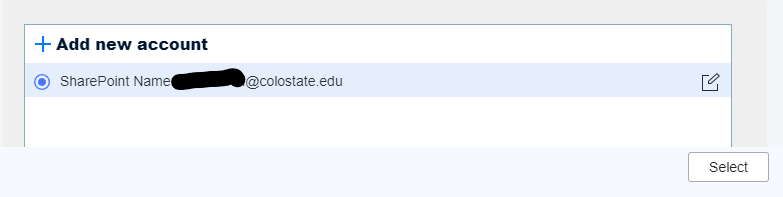
After this you will have a new account listed in the “Add new account” area. Select your new entry and click the “Select” button.
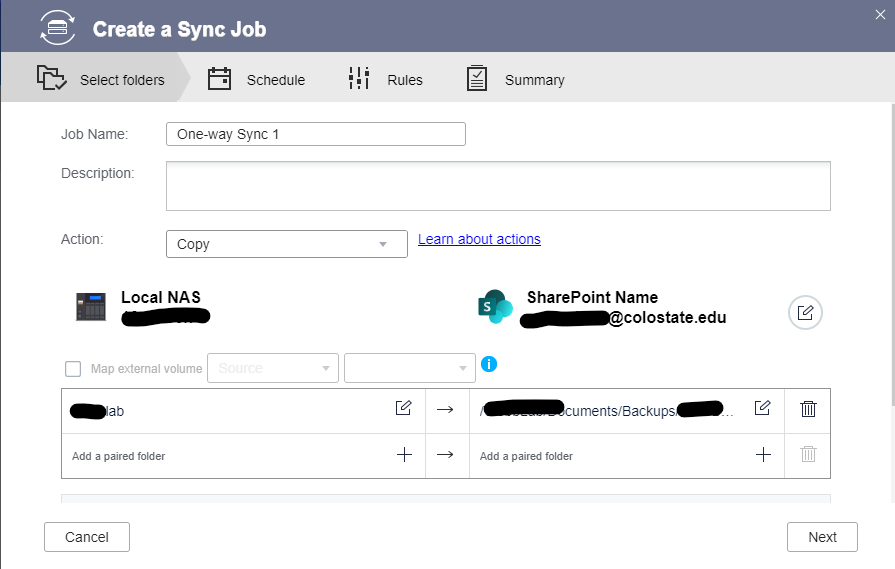
You will now see the following window for setting up the Sync Job. On the left side you will select the folder on your NAS that you want to backup to SharePoint.
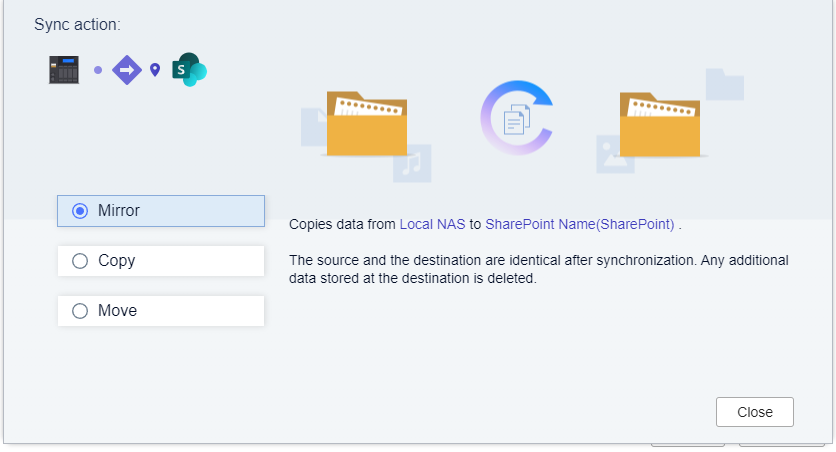
For the “Action” drop down, please refer to the following. The default is “Copy” which will not delete files on the destination – however, “Mirror” is likely the choice to use as this will synchronize the destination in terms of files deleted on the source. This is up to you, of course.
On the left side you will need to browse the list of all SharePoints until you find your site. When you find it, be sure to drill down to the subdirectory you want to back up your data to. Once selected, click the “Ok” button.
You can now proceed through the rest of the Sync setup. You may choose to schedule regular synchronizations to SharePoint using the Schedule step. You can safely leave the Rules area as is. All of these options can be updated after you complete the setup as well in case you change your mind about something, especially the Schedule area.
From this point you can either run the sync job manually with the “Sync Now” button or leave it to run per the schedule you set.