Skip to Main Content

RStor: Manage Permissions
By Ross Madden
Published on September 21, 2018 1:36 pm MT Posted in General CNSIT, Internet & Networking, Knowledge Base, The Cloud, Tips and Tricks, Windows
IMPORTANT! While these directions are still technical doable, permissions on RStor can now be more easily managed using Grouper (https://grouper.colostate.edu) – Please review these directions before proceeding: https://cnsit.colostate.edu/kb/manage-rstor-group-access-with-grouper
One of the great things about the RStor service, is the ability for a share owner to administer the permissions without CNSIT assistance! To manage the permissions in RStor you will need to have access to a Windows computer where you have connected to your RStor share (for connection instructions, see here: https://cnsit.colostate.edu/kb/rstor-how-to)
If you do not have any access to a Windows computer, then you will still need to contact CNSIT for permission changes. You can do so by creating a CNSIT Ticket at https://cnsit.colostate.edu/help
If you are unsure what RStor is or how to request a space, check out the following: https://cnsit.colostate.edu/kb/rstor-has-arrived
Adding a new user and modifying permissions
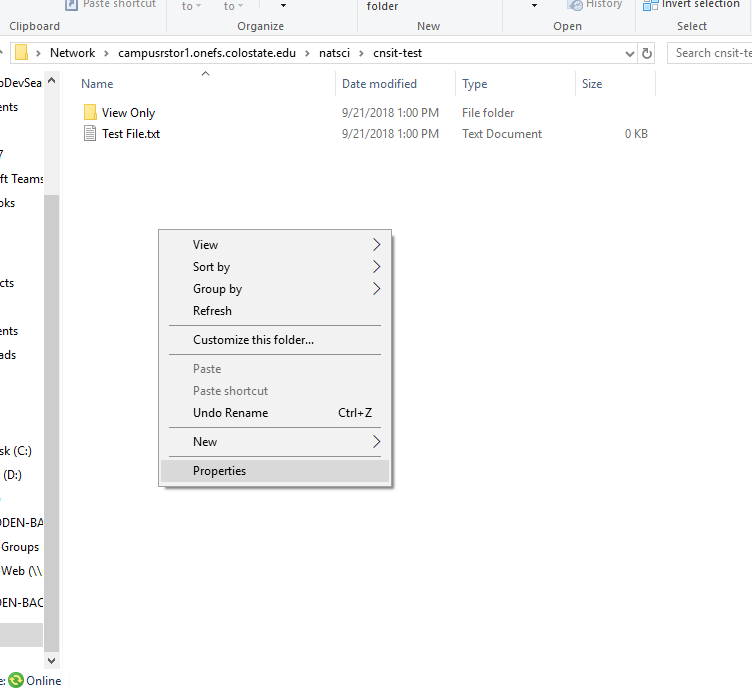
When adding a user to your RStor group, you must first open the share in an Explorer window. From here, right click in some of the empty space and choose the “Properties” button as shown in the following screenshot. Alternatively, you can navigate to the Home tab within your Explorer window, and select the ‘Properties’ option:
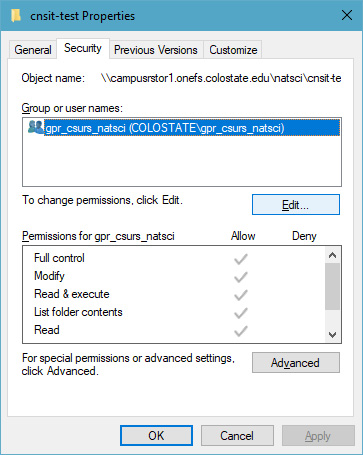
You will then see the following dialog window appear. This displays the current permissions of the base share folder. Your folder will also contain the owner’s eName. If you select a given user/group, you will see their effective permissions in the lower portion of the dialog. To add a new user, you will first click on the “Edit” button.
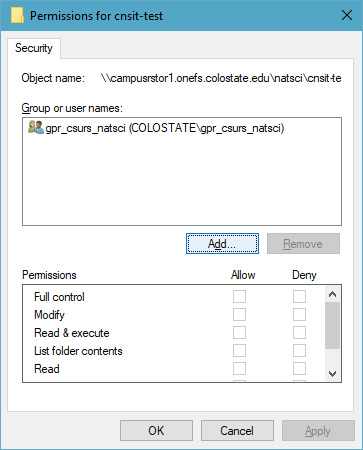
You will now see the following dialog window. This is where you can modify an existing user’s permissions. We will continue on to add a user for which you should click on the “Add” button.
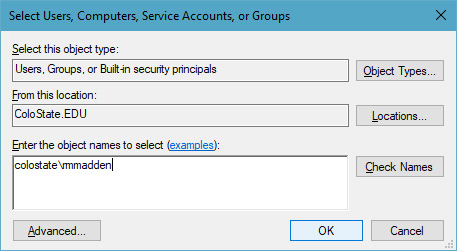
Now, you need to type in the name of the user you wish to grant permissions to. When typing in these eNames, be sure include “COLOSTATE\” before the eName as shown. Once entered, you can click the “OK” button.
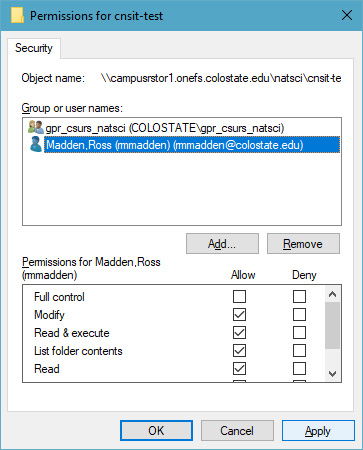
You will now be able to set the permissions for this user (or any user in this view). First, select the user in the list to enable that user’s permission checkbox list as shown below. You can be creative in how you are setting these permissions. Use the following definitions to help set the appropriate level for a given user. Keep in mind, these permissions are for the current folder/file only.
Full Control allows you to read, write, modify, and execute files in the folder, change attributes, permissions, and take ownership of the folder or files within.
Modify allows you to read, write, modify, and execute files in the folder, and change attributes of the folder or files within.
Read & execute will allow you to display the folder’s contents and display the data, attributes, owner, and permissions for files within the folder, and run files within the folder.
List folder contents will allow you to display the folder’s contents and display the data, attributes, owner, and permissions for files within the folder.
Read will allow you to display the file’s data, attributes, owner, and permissions.
Write will allow you to write data to the file, append to the file, and read or change its attributes.
From here, you can click the “Apply” button to save the changes, and the “OK” button to close the dialog window.