Skip to Main Content
Step 1 – Set up Permissions
Step 2 – Connect to Shared Folder
Sharing Email Folders – Outlook Desktop Client
By Aaron Vanasse
Published on April 2, 2019 2:17 pm MT Posted in E-mail, General CNSIT, Knowledge Base, Tips and Tricks
Sometimes it will be necessary to share an email folder or sub-folder with someone. This walk through is broken into 2 steps. Step 1 is setting up the sharing permissions and Step 2 is connecting your shared mail box folders with another user’s Outlook client.
Step 1 – Set up Permissions
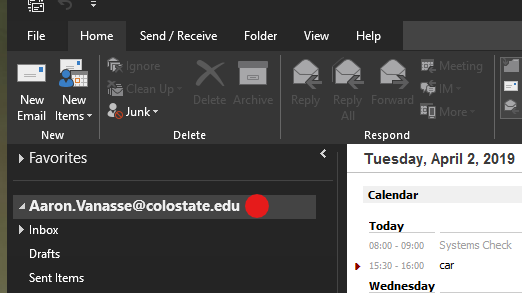
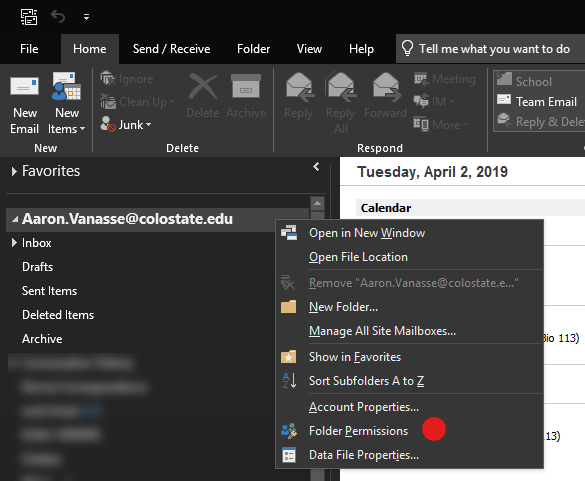
On the Outlook client that is being shared, right click on the top level of the email account (left pane of outlook client), it will look like “your.name@colostate.edu”.
At the drop-down menu, select “Folder Permissions”.
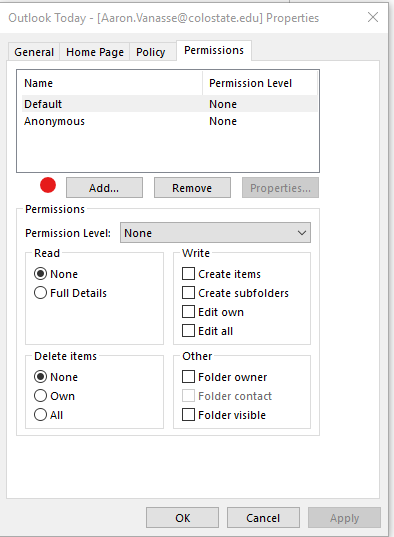
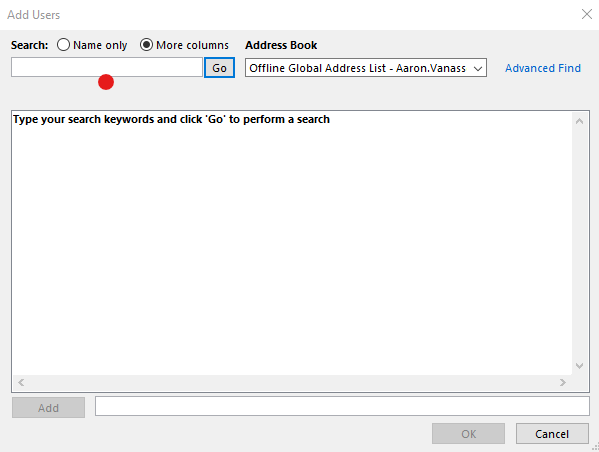
A box will pop up, select the “Permissions” tab and click the “Add…” button.
Search the Global Address List (GAL) for the correct user and click the “Add” button and then “Ok” button.
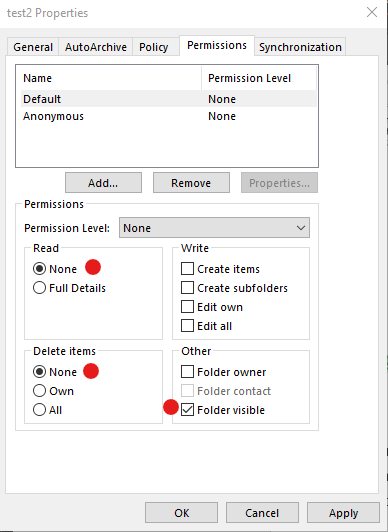
Now we set permissions. CAUTION with this as you can easily give someone full control over your email.
Under Read, select NONE
Delete Items Select NONE
Permissions level None
Check box Folder visible
Click Apply
If you are drilling down to a sub-folder, you must do the same process above for each folder in the chain.
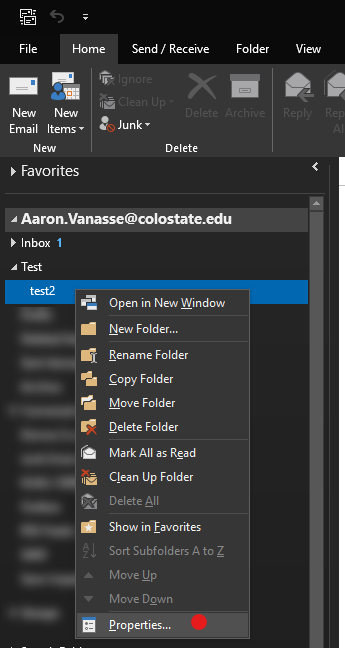
Once you get to the sub-folder you want to share, right click that folder and select “Properties” from the drop down menu. For this walk through I have created a sub folder in my inbox called “Test” and sub-sub-folder called “Test2”. The next steps will be applied to the Test2 sub-folder only, as this is my target folder.
A box will pop up. Select the “Permissions” tab.
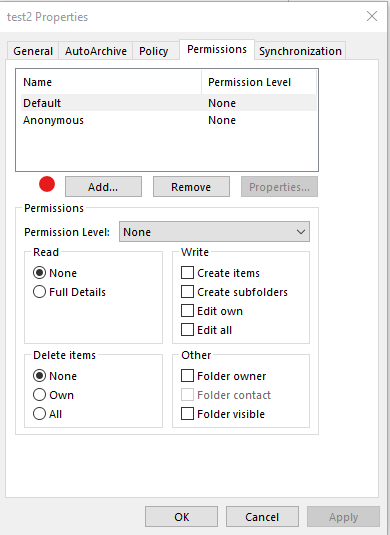
Click the “Add” button and find the appropriate user in the GAL and click add in the lower left then click the “OK” button.
Here is where you will select the Permissions Level to give the person you are sharing your email with the appropriate permissions. There is a drop-down box (Permissions Level) where you can select default sharing options, or you can manually check the boxes yourself. Make sure that Full Details is selected under Read.
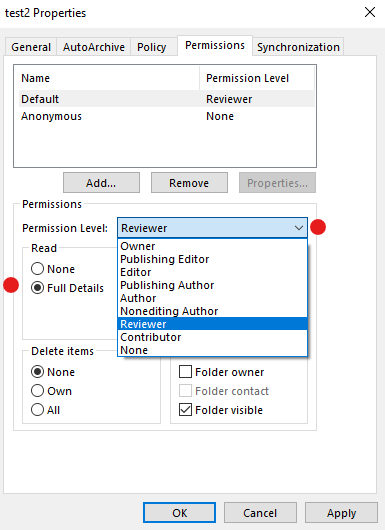
Click the “Apply” button and then the “OK” button.
The person you are sharing with is now added. Now we move on to the person we are sharing the email with.
Step 2 – Connect to Shared Folder
Open the Outlook client of the person you are sharing with.
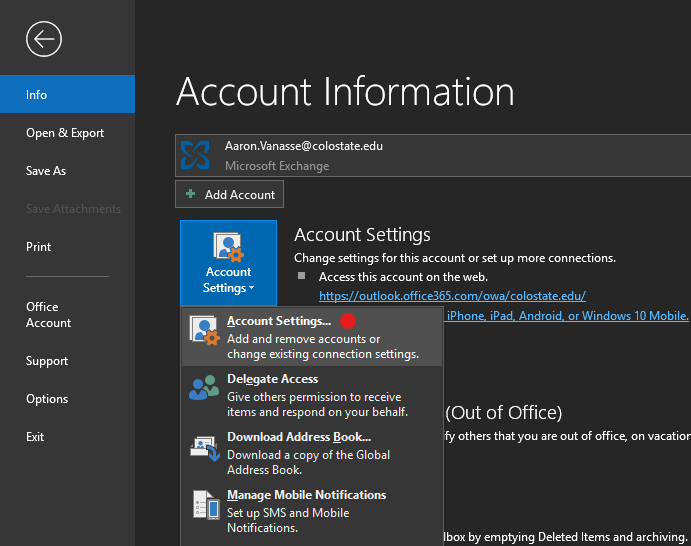
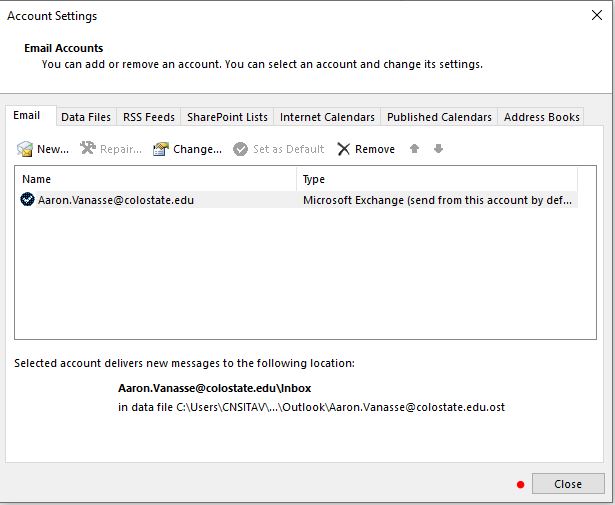
Click “File” in the top menu and then select “Account Settings” in the “Info” pane.
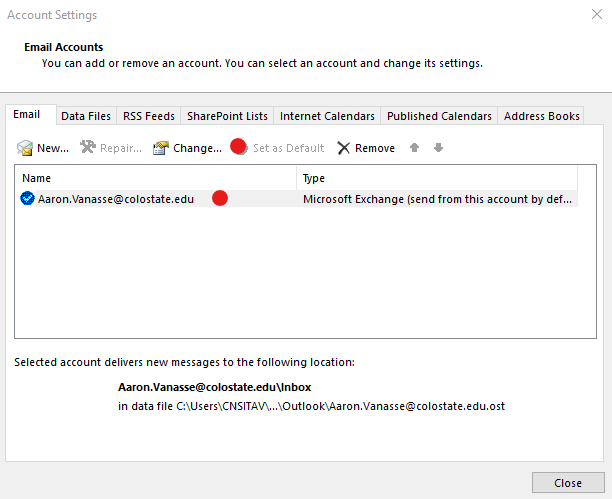
A box will pop up, select their address and click “Change …”.
Another box will pop up and select “More Settings …”
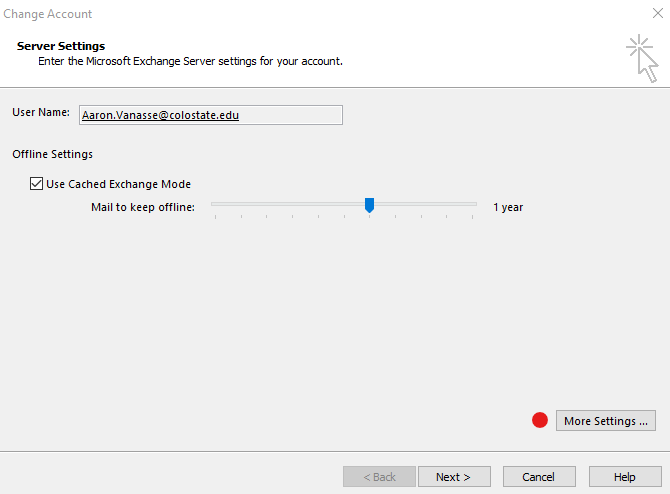
Another box will pop up and select the “Advanced” tab
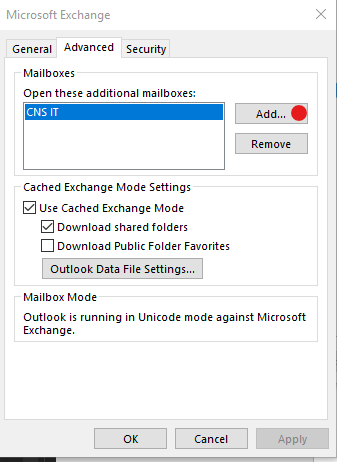
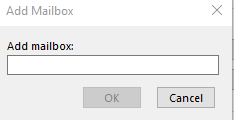
Click the “Add” button and a small box will pop up, type the person’s name in the same format as the GAL <eg> doe,john and press enter or click the “OK” button.
On the following screens click “Next” and “Finish” buttons in sequence.
Finally, click the “Close” button. You should now be back at your Outlook client main screen.
You have now added the mail folder to the Outlook client.
In the email folder section of Outlook (far left column) scroll down to the bottom and you should see the added email account, now expand (using the little arrows to the left) and however many sub folders you have, you should see them in order with the the last folder being your target, should have email in it. If there is email in any of the other folders above the last one, the permissions are wrong, and you need to go back through the sub folders at your Outlook client to correct them.
If you have trouble completing these steps, please be sure to let us know with a CNSIT ticket (https://cnsit.colostate.edu/help) and we can set up an appointment with you to get things working.